Introducing my 3D Printer
Anycubic I3 Mega
Getting started:
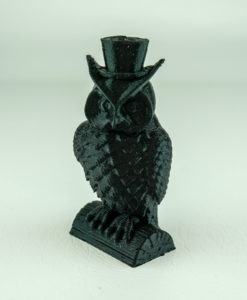
As first 3D printer I decided to get an Anycubic I3 Mega. This printer comes almost pre-assembled, only 4 screws are needed to put the printer together. After levelling the bed I printed the provided test file, an owl. Which turned out really nice. The print quality is really good out of the box. Nevertheless it feels wrong to me to keep a machine in its original state. I always like tinkering around and improve things.
Making the printer more quiet:
Since the printer runs in my room just next to me, the noise level is really important. The loudest parts where the stepper motors drivers, which caused the motors to whine. After switching the stepper motor drivers to Watterott SilentStepStick 2208 there was already a significant improvement. I run those drivers at the stealthChop2 mode. Now the fans were the loudest parts, so over time I also replaced all of them for quiter ones.
Enclosure for my 3D Printer:
But still, I knew I could make it even more quiet. So I thought about building a dampened enclosure. The housing can also be used to raise the ambient temperature, which can improve print quality for some materials. Filament like ABS tends to warp, which can be reduced with an enclosed printer. This also increases the overall strength of the printed parts. After some research I came up with a design for my enclosure. It is made of MDF with drawers to allow easy access to the printer if needed. This is an essential feature in my opinion. If you plan on building your own enclosure, make sure that you can easily access the printer. Either by lifting it up or also create a mechanism to reach the printer from different angles.
Control the temperature inside the enclosure:
Since the ambient temperature inside the enclosure tends to get too warm, I added an extraction fan which triggers at a temperature of 40°C and stops again if the ambient temperature is below 38°C. To achieve the temperature control I simply used a cheap temperature control module. It is really easy to install this module, just connect 12V to the module and connect your fan with its own power source. The only thing left is to set the temperature. You need to make sure that the electronics are either outside of the enclosure or you should actively cool them. To ensure the cooling of the electronics there is another 120mm fan in the bottom of the enclosure which blows cool air directly to the electronics.
I quickly realised that it was too dark inside the enclosure. The next step was adding an LED strip to the frame of the printer. To keep up with the additinal power the LEDs draw I also upgraded the power supply. With the bigger power supply I also have the possibilty to add more features.
If you are also interested in getting an Anycubic I3 Mega: